.png)
 2 days ago
9
2 days ago
9
Time to get to all the Hieroglitch Pyramid collectible locations. Following the Astro Bot guides, once you complete all the levels of Serpent Starway, you’ll unlock Camo Cosmos, which boasts over 50 collectibles spread across all its levels. Hieroglitch Pyramid, the first level, offers a total of 10 collectibles and a secret to uncover throughout.
This level, with an Egyptian theme, will require you to be cautious about where you progress so as not to miss the opportunity to access certain areas. These are the Hieroglitch Pyramid collectible locations. This level has a unique ability that will make you able to enter smaller places.
Hieroglitch Pyramid Collectible Locations: Bot 1
 The first bot to rescue is just at the beginning of Hieroglitch Pyramid. Image via PS5Trophies YouTube Channel.
Right after landing in the level, even before grabbing the special ability, you’ll encounter a series of easy-to-defeat enemies immediately next to the checkpoint.
Once you defeat them, head to the right side, where you’ll see a group of enemies near what appears to be a sarcophagus with a bot clearly hidden inside. After defeating the enemies, you can hit the sarcophagus to free the first of seven bots found among the Hieroglitch Pyramid collectibles.
Bot 2
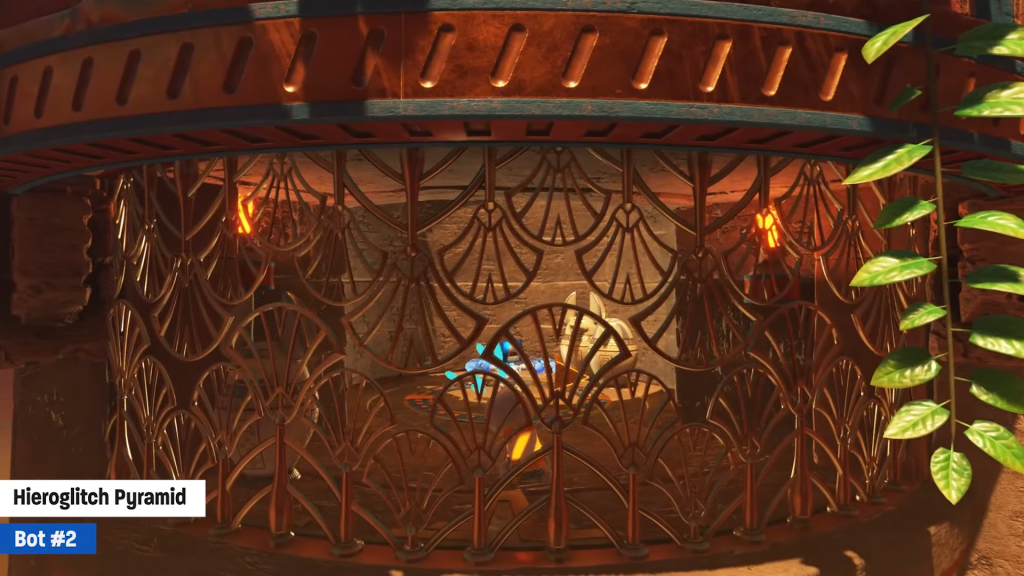 The second bot is beneath a crack in the sand. Image via PS5Trophies YouTube Channel.
Continuing along the main path of the level, you’ll come across two enemies on a circular platform, still without the special ability. Defeat them, and once the area is clear, you’ll notice a crack in the floor where you need to hold down the square button to spin quickly and open a hole.
Once you’ve done so, you’ll discover the second bot, poised for rescue, imprisoned beneath this platform in a cage-like structure. Astro Bot’s collectibles continue to amaze.
Bot 3 (Lara Croft Bot)
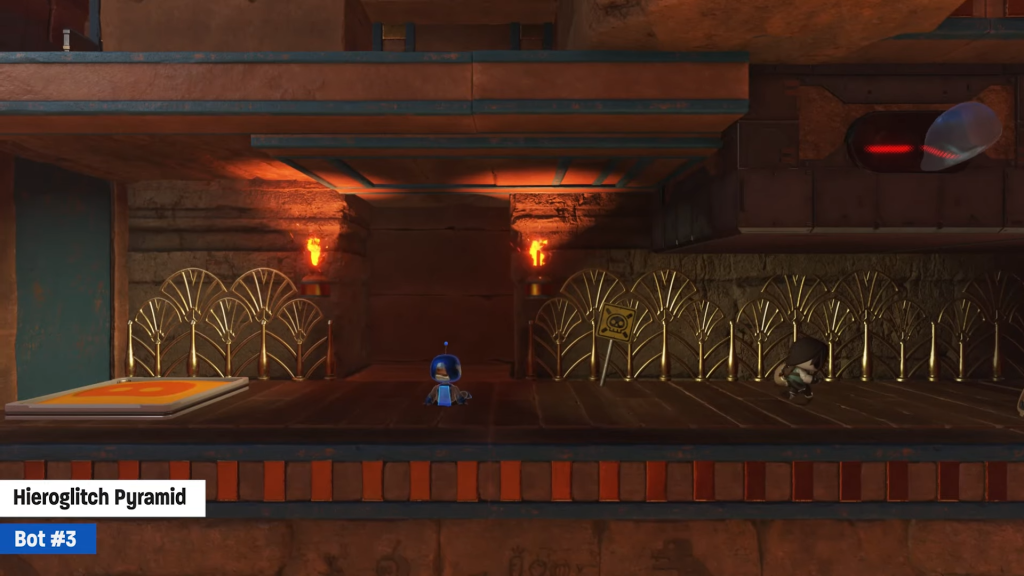 Lara Croft bot is about to discover a treasure. Astro Bot makes a Tomb Raider reference. Image via PS5Trophies YouTube Channel.
To avoid crushing, you must swiftly navigate a series of up-and-down platforms on the right side of the level. Each of these platforms has a recess where you can break pots to collect coins.
However, the last platform on the far right will have a hole in the floor where, by spinning, you can access the underground. Once there, you’ll find a bot walking on tiptoes, referencing Lara Croft from Tomb Raider.
In this place you will find that there are robotic platforms sleeping; if you walk slowly, you can rescue Lara and go back without waking up these platforms and avoid being crashed.
Puzzle Piece 1
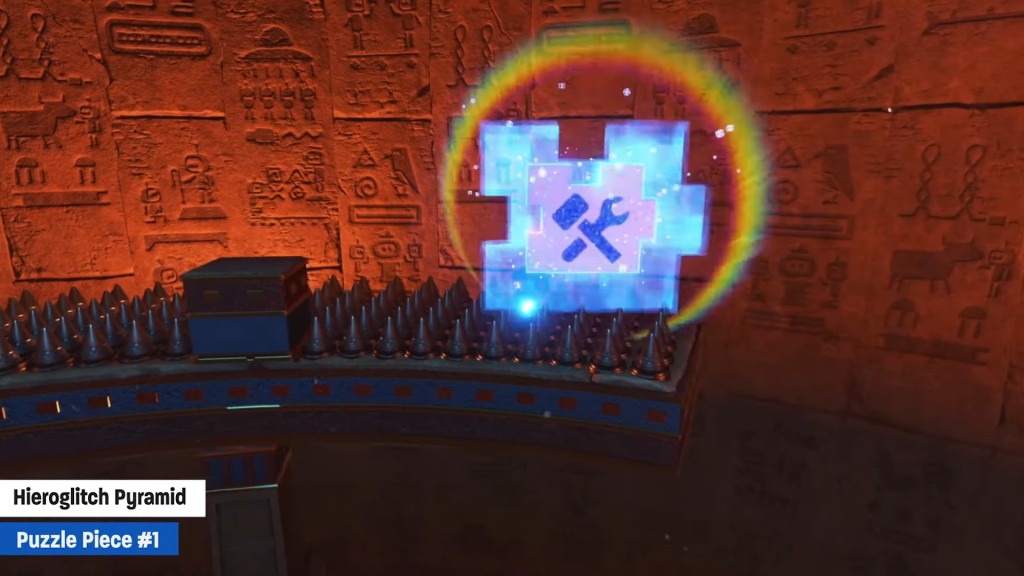 The first puzzle piece is inside the chamber where you find the power of this level. Image via PS5Trophies YouTube Channel.
After returning from those platforms, continue along the main path of the level, still without the special ability that will be key to obtaining all the collectibles in the Hieroglitch Pyramid.
Eventually, you’ll reach a checkpoint, and to the right, you’ll enter a chamber that will automatically close, but it will contain the chest with the ability for this level. This ability allows you to turn into an iron ball, enabling you to pass through smaller spaces and survive any type of hit.
Following the route in this chamber, you’ll find coins and several enemies to defeat, and at one point on the left side, you’ll come across a gap to enter. When you see this gap, don’t enter it just yet—keep going a bit further to the right, where you’ll see the first puzzle piece.
Bot 4
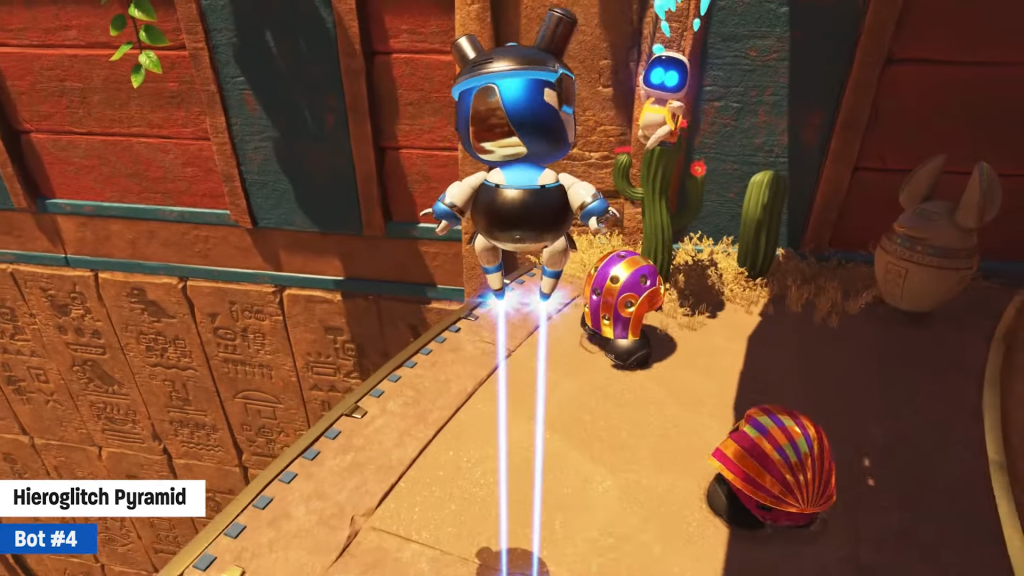 The fourth bot is up after you use a trampoline to jump. Image via PS5Trophies YouTube Channel.
Once you obtain this first of the three puzzle pieces, backtrack slightly and go through the small gap to exit the chamber. It’s important to note that once you exit this chamber, you won’t be able to re-enter, so make sure to grab the puzzle piece before leaving.
Once you exit the chamber, turn right and transform into an iron ball. This allows Astro Bot to break through some crates that are blocking a trampoline. After defeating two enemies, you can rescue the fourth bot by jumping on this trampoline twice.
Puzzle Piece 2
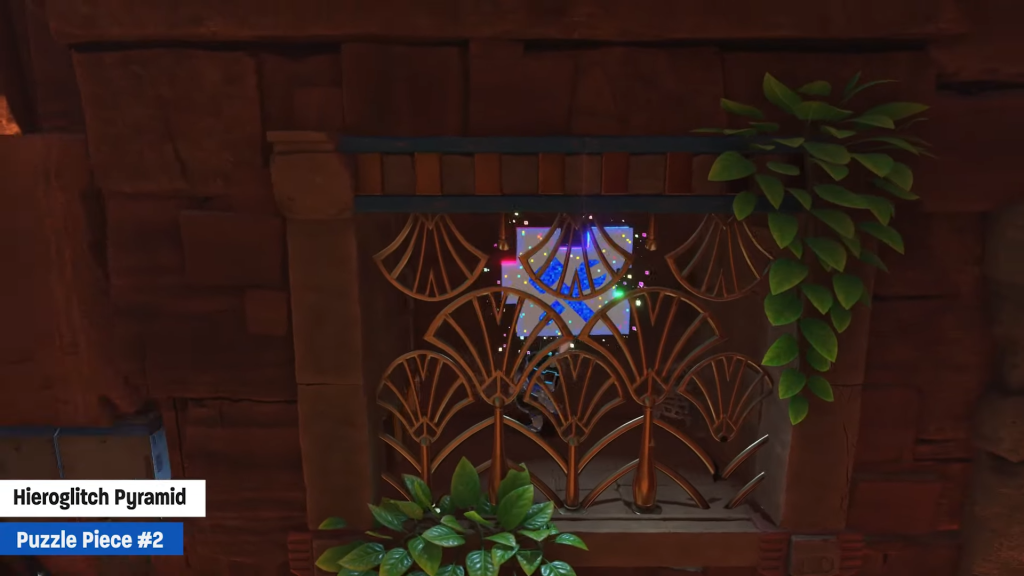
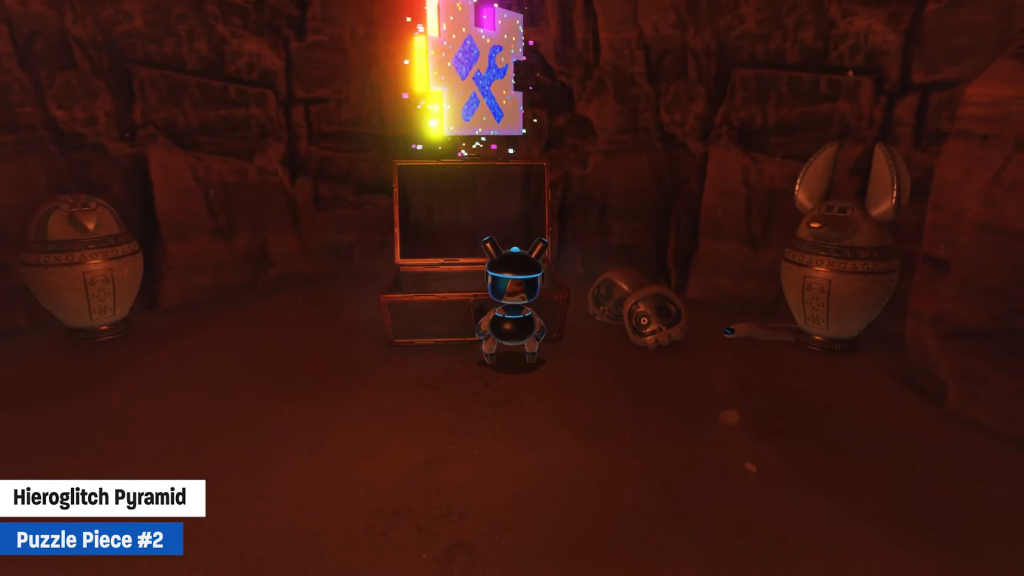 The second puzzle piece is inside a little crack in the wall in the same area where you save the Lara Croft bot. Image via PS5Trophies YouTube Channel.
Once you’ve jumped off the trampoline where you rescued the fourth bot, you’ll need to retrace your steps to the left, where the platforms were located, and discover the Lara Croft bot.
Before returning to those platforms, you’ll notice a nook in the wall that you can access if you use the level’s iron ball ability. Inside this chamber, you’ll find a chest that, when hit, will release the second of the three puzzle pieces. This puts you halfway through the Astro Bot level’s collectibles.
Bot 5
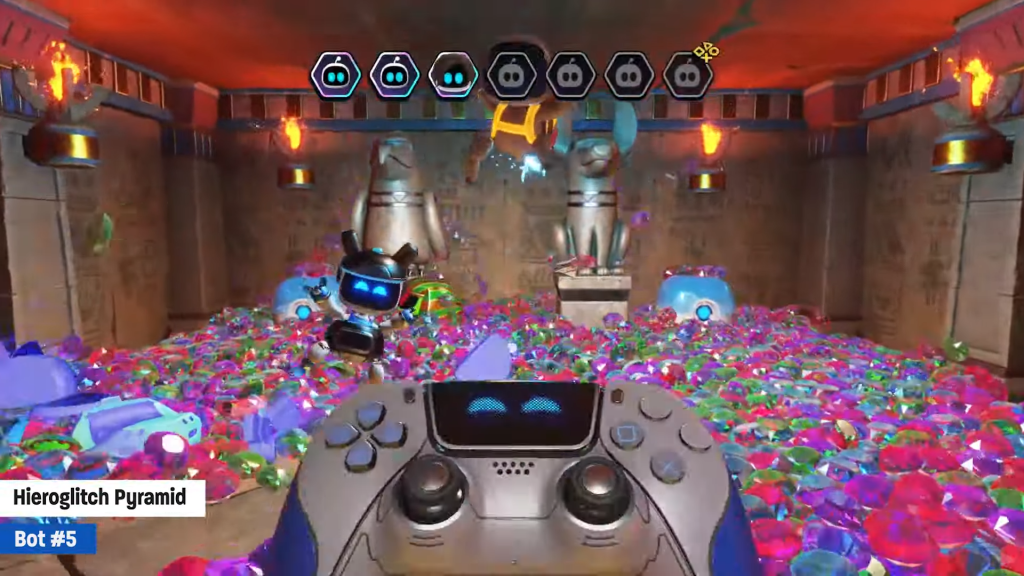 Astro fifth bot is hidden behind a wall with a weak spot. Image via PS5Trophies YouTube Channel.
After collecting the second puzzle piece and backtracking slightly, you’ll see that grabbing the special ability caused a platform with a sort of volcano to appear.
This volcano will launch Astro Bot to a place with several collectibles. This area is to the right of the level, where you’ll see a moving platform crushing spikes. Before heading in that direction, you’ll need to jump off the platform where you currently are.
Down there, you’ll find a wall to interact with, and you’ll need to find the weak spot and push it in to open a chamber. This will reveal the fifth bot, one of the seven to be saved as part of the Hieroglitch Pyramid collectibles.
Puzzle Piece 3
 The final puzzle piece is in a hidden place upside of a moving platforms. Image via PS5Trophies YouTube Channel.
After climbing the stairs and rescuing the fifth bot, you’ll return to the platform where the volcano launched you.
Now you’ll need to make your way to the moving platform that crushes spikes. Once you’ve navigated that section, you’ll find a trampoline that you can interact with.
Thanks to this trampoline, you’ll reach the upper part of these moving platforms. Head to the right and wait for the last one to lower. You’ll find a hidden nook to enter and retrieve the final puzzle piece for this level.
Bot 6
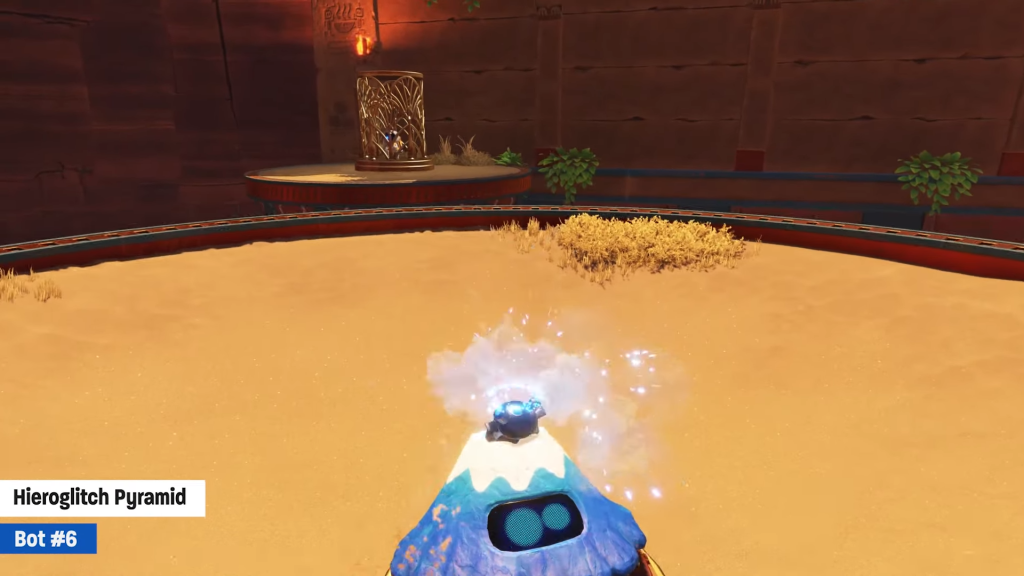 The volcano must align with the cage to free this bot. Image via PS5Trophies YouTube Channel.
After exiting the area where you obtained the last puzzle piece, you’ll encounter another volcano that will launch you onto a sand-covered platform, landing you directly into what appears to be a golf ball hole.
After exiting this hole, you’ll encounter another volcano, but this one moves constantly. On the left side of this moving volcano, you’ll see a cage with a bot trapped inside.
In this case, you’ll need to wait for the volcano to rotate in that direction and time your jump perfectly to break the cage in one hit. After completing this, you can rescue the sixth bot.
Bot 7 (Tir Bot from Suikoden)
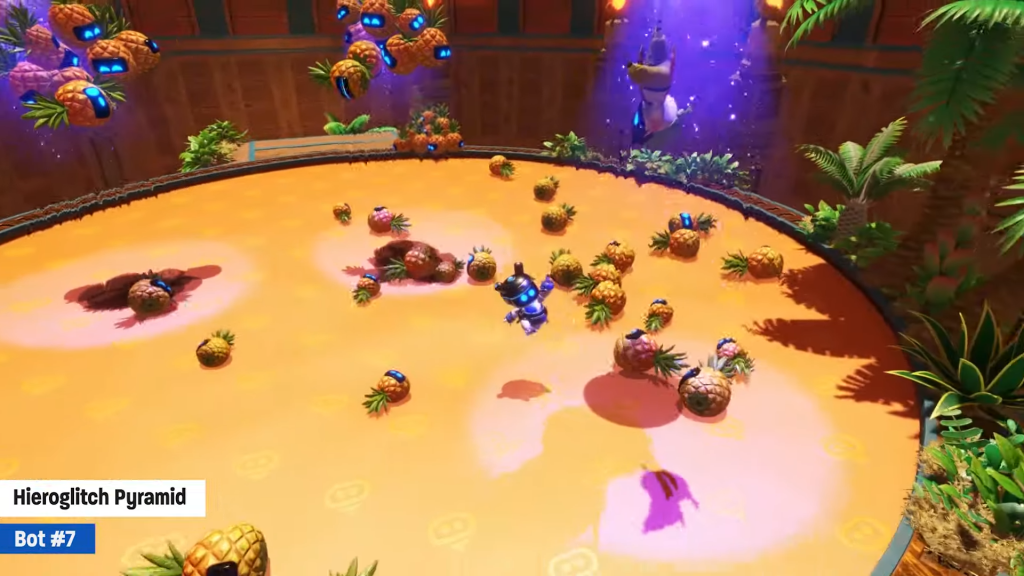 The seventh and last bot is from Suikoden and is inside a secret part of the level. Image via PS5Trophies YouTube Channel.
Again, use the rotating volcano and wait for it to turn right. Quickly jump onto it so you can break a seal with Astro’s face and access the next part of the level.
Once you break the seal, you’ll ascend a gravity platform, where you’ll encounter several boxes that require the level’s special ability to open. After breaking them, you’ll reveal a cable that you’ll need to pull. When you pull it, you’ll enter a mini-secret level where you must use a trampoline to hit some UFOs in the air.
One of these UFOs holds the last bot to be rescued in this level, referencing Tir McDohl from the Suikoden series.
Lost Galaxy
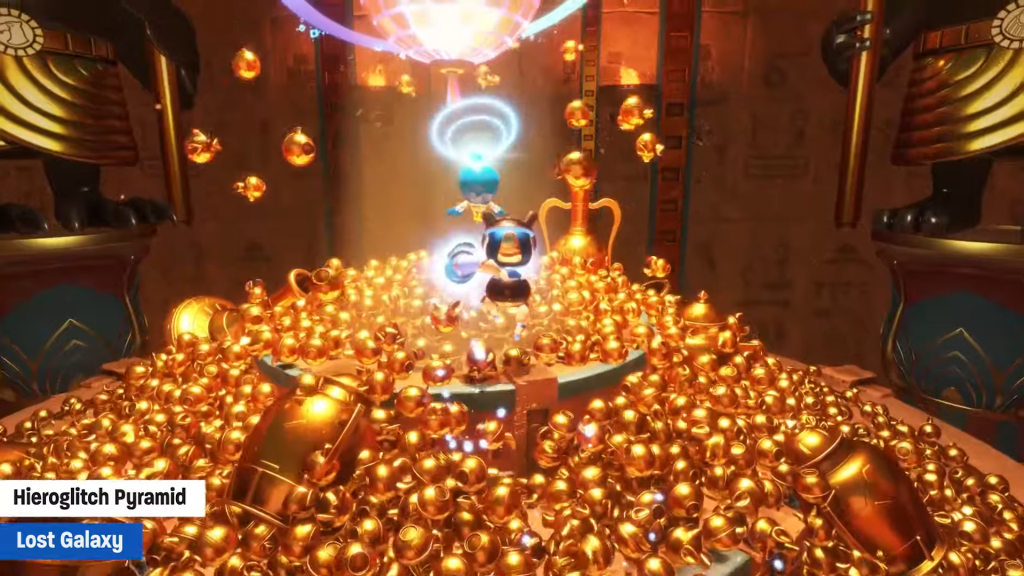 The Lost Galaxy is behind several walls with weak spots that could crush you if dont activate them quickly. Image via PS5Trophies YouTube Channel.
Near the end of the level, when you’re about to climb onto the platform to leave, before doing so, head to the right, where a platform will continually drop diamonds.
On this platform, there’s a hidden trampoline that will take you to a higher area. You’ll find a wall where you can detect the weak spot and push it in.
Once inside, you’ll find the Lost Galaxy waiting for you, but you’ll have to navigate two more moving walls to find the weak spot. Act quickly to avoid crushing yourself.
That was all the Hieroglitch Pyramid collectible locations. What are your thoughts on level? Which is your favorite level in Astro Bot? Let us know in the comments!


 Bengali (BD) ·
  English (US) ·